Sage 200 - Add a new company.
Add company
When you add a company, enter the company details and the financial year start date.
You then need to assign users to the company.
To add companies
Open: System Administration > Companies.
- Right-click Companies and choose Add New Company.
If Sage 200 detects any background task, you will see the following message:
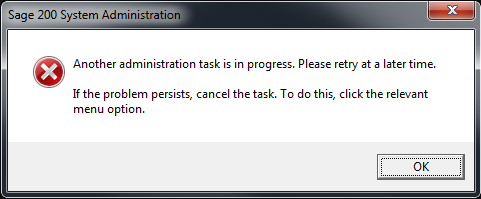
Check whether another Sage 200 user is creating, updating or deleting companies at the time. If so, wait until they have finished before trying again. If not, you can clean up the background tasks. To do this, select Sage 200 SA and then select Clean up background tasks.
On the General tab, enter the Company Settings:
Enter the Server Settings.
Each company's information is held in a unique company database.
If you are using more than one version of SQL server, when you add companies from the second SQL instance, you should:
- Enter the server and database names manually (rather than clicking the browse icon).
- Once you have entered the details, click Update (instead of Test).
Otherwise, you may see an Error Occurred! message.
- Select the action.
- Create: Creates the company and prompts you to enter the financial year start date.
Test: Tests the connection exists and states which version of the company database is connected.
- Update: Updates the company database and states the database version number.
When you click Create or Update:
If Sage 200 detects any background task, you will see the following message:

Check whether another Sage 200 user is creating, updating or deleting companies at the time. If so, wait until they have finished before trying again. If not, you can clean up the background tasks. To do this, select Sage 200 SA and then select Clean up background tasks.
To make it easier to see which company you are working with in Sage 200, use the Banner Settings to display the company name and a colour for the company.
- To select the Company Colour, click the Not set box next to Company Colour (or click Configure).
- To display the company name, select Show Company Name.
On the Members tab, assign users who can use the company within Sage 200.
You must assign users to the company before they can log on and use the company data.
You can also assign companies to users.
If you allow online payments, select the Online Payments tab to assign a vendor account for the company.
The vendor account must already be set up.
- Click OK to confirm the company details.
Related Articles
Sage 200 - How to change a company name.
How to change a company name. 1. Log in to the Sage system Administrator 2. Click on “Companies” 3. From the list of companies on the right hand side, Double Click on the Company you want to rename. Then Edit the company Name and click “OK”. Then ...Sage 200 - User access for a company.
Set user access for a company Open: System Administration > Companies. Right-click the Company Name and choose Properties. Select the Members tab. User names in bold mean that the user has access to all companies within User Properties. Assign users ...Sage 200 - Importing Exchange Rates (Add-on).
Anyone working with multiple currencies knows the hassle of updating exchange rates. Both time-heavy and risk prone, it’s an inefficient process. With this in mind, we have developed a new add-on. With data from XE.com, this software automatically ...Sage 200 - System Requirements Guide For on-premise deployment of 2022 R2. (Attachment).
Please refer to the attached guide.Sage 200 - Reconciliation Notes for Period Ends.
Reconciliation Notes for Sage 200 1. Ensure when comparing reports you are comparing like for like. For example, don’t always compare the Trial Balance (TB) to an Aged or a Transaction Report. The TB uses the Period Number a transaction was posted to ...